Command Line Software for Automatic Printing
fCoder 2Printer is a command line tool for printing documents and images in batch mode. It lets you automate the printing of documents, images, texts, drawings, worksheets, presentations, invoices, and many other files. Since it has no graphic interface, the application is highly efficient, fast, and reliable. 2Printer can work as a standalone tool, be integrated into another software, or launched from scripts.
Primary features
What else you can do with 2Printer
Types of printing available with 2Printer
Primary features
Running Commands from CMD, PowerShell, or another CLI
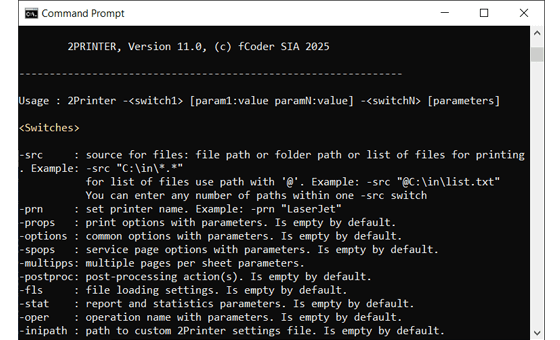
To run 2Printer commands, you can use any command line interface (CLI) that you prefer. For instance, you can use Windows PowerShell, including PowerShell 5, 6, and 7 or the good old CMD (Command Prompt) – 2Printer works well from any interface.
Only One Command Line for All Print Parameters
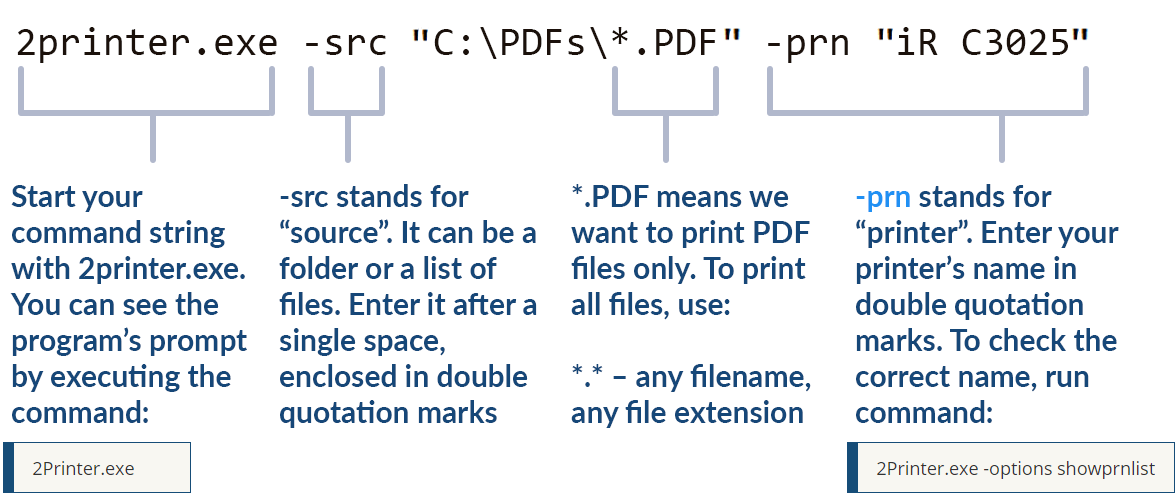
2Printer command line syntax allows you to add as many print parameters as needed to the command line at once. Set up automatic printing just as needed – within a single command line.
Plus, you can add as many switches as you want (-switch parameter:value) – and they don’t need strict order.
The command line is too long, what do I do?
The maximum length of the string that you can use at the command prompt is limited. To work around the limitation, use the switch -cmdline to run the 2Printer command from a TXT file.
Printing to Multiple Printers at Once
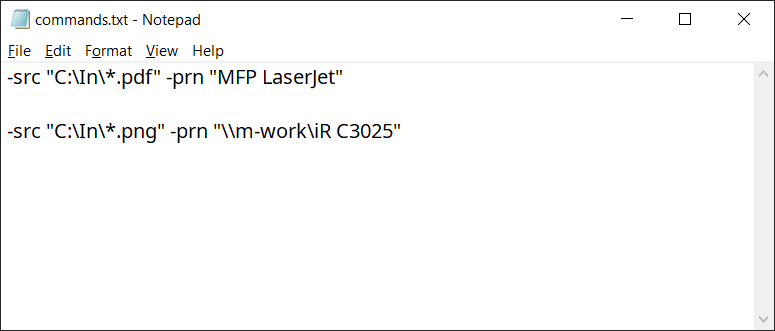
Using the -cmdlines switch, 2Printer can execute multiple commands consecutively. To utilize this feature, create a TXT file containing the desired commands. For instance, you can print to multiple printers using just one command with the necessary print settings.
Using Various Sources of Files
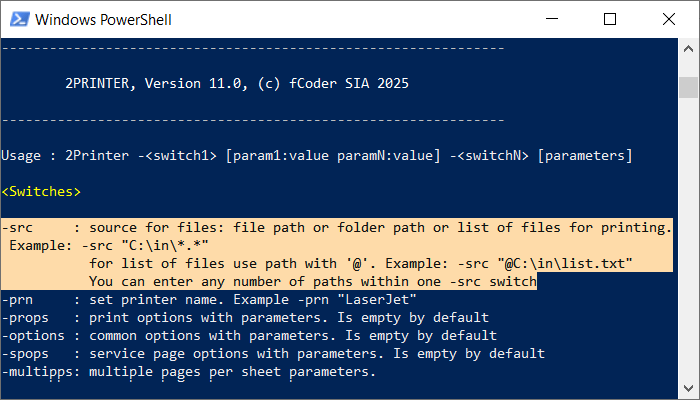
You can use various sources of files (see examples):
- Path to a single file
- Folder path
- List of files (TXT or Excel file)
- Web address (URL)
If you select a folder path as a source, it is possible to scan subfolders and print files from there, too.
Print all files listed in a plain text file or Excel spreadsheet
You can print all documents from a list (file paths listed in a TXT or Excel file). Use the @ symbol at the beginning of the path when entering a command. Indicate a list of files like this: -src "@C:\List\files.txt"
Set multiple sources of files
You can use multiple sources at once to print files from at the same time! Example: -src "C:\In\*.*" "E:\Files\*.pdf" "@C:\Lists\list.txt"
Printing Multiple Pages or Documents on a Single Sheet
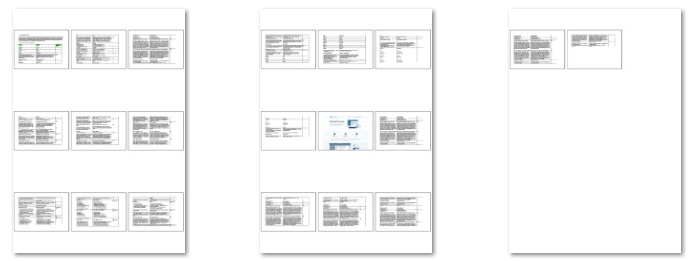
With 2Printer's Multiple pages per sheet mode, you can arrange several pages of a multi-page document (or several different documents) on the same sheet of paper before printing. Printing several documents/pages on a single sheet of paper can help you save paper or, for example, print many small images or pages in a compact way.
Booklet printing mode
In the Multiple pages per sheet mode, there is a Booklet printing option that allows you to print booklets. Two pages per sheet are printed on both sides and arranged in a specific sequence. Thus, after printing, folding and stapling the sheets, you will have a booklet.
This mode can be enabled either from the command line or from 2Printer Settings.

Printing in Strictly Defined Order with Single Print Job Mode
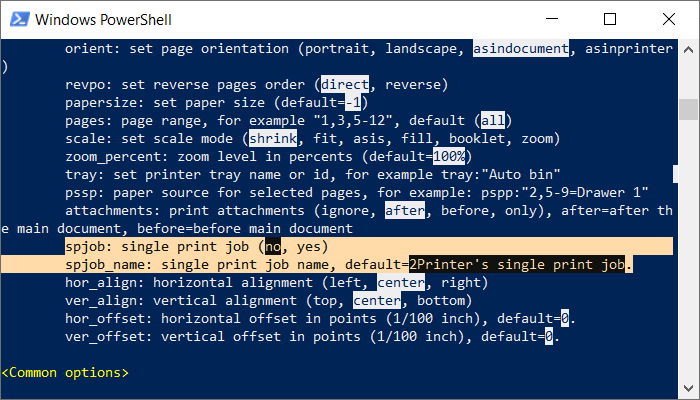
Enable Single print job mode (-props spjob:yes) to:
- Print files in 100% correct order (and not mixed by spooler) so there will be no need to collate the printouts manually;
- Prevent getting the printouts mixed up when documents come from different users to the same printer in the office.
Separate Printouts by Adding Cover Page
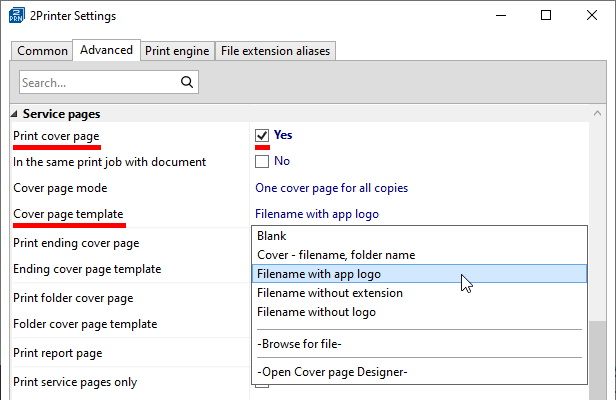
2Printer allows you to add a cover page – a special sheet of paper for separating printed documents (also known as a "slip sheet"). 2Printer has several types of cover pages:
- Blank sheet of paper (Blank)
- Ending cover page (Print ending cover page)
- Folder cover page (Print folder cover page)
- Custom cover page (created via Cover page Designer)
To configure any type of cover page, you can choose a blank sheet of paper or a built-in template. Cover pages can be printed in the same print job with the documents.
Create a custom cover page
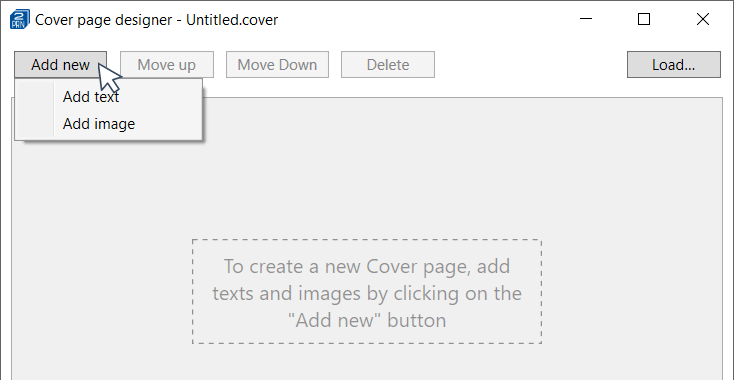
With Cover Page Designer, you can create your own cover page template using custom text and/or images. It allows you to create, save, and load your *.cover files. Both Add text and Add image settings have a variety of parameters to configure such as alignment, offset, position, rotation, opacity, and more.
Operations: Resize, Crop, or Rotate Files before Printing
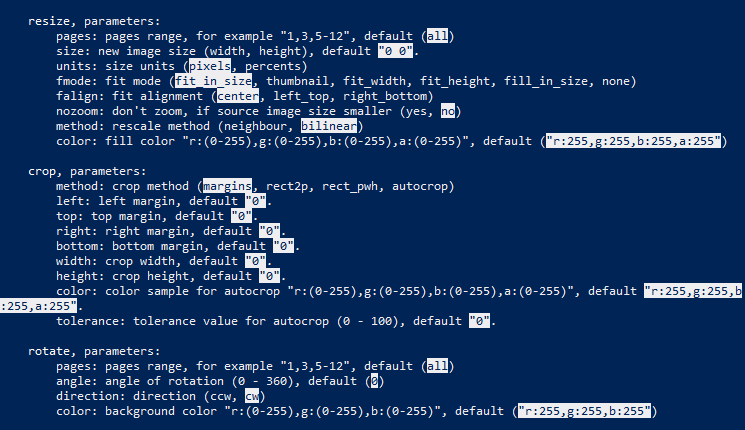
Set image resizing, cropping and rotation in advance! With operations -oper resize, -oper crop, and -oper rotate, you can adjust your images or document pages beforehand to print them the best way possible.
Post-print Actions: Move, Copy, or Delete Files after Printing
There's an optional feature to automatically delete, copy, or move files to another user-specified location after batch printing is complete.
This feature can be configured for both failed and successfully printed files.


Watermarking Images and Documents
2Printer allows you to add an image, text, or barcode watermark automatically before printing. It can be any text or an image / PDF / HTML file. There are many options available like font, size, style, position on page, rotation, z-order (background or foreground position).
Inserting a watermark is possible either from the command line or from 2Printer Settings.
Add pagination and more
You can add page numbers automatically – by using the {srcfilepageno} macro. Besides, you can take advantage of other built-in macros that can add file or folder name, source file data, date, time, and more.
Configure Default Settings with GUI Controls
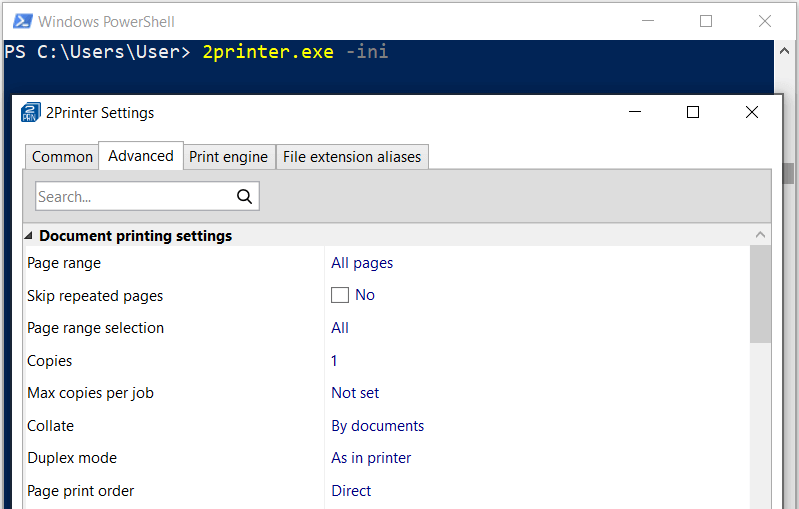
in the 2Printer Settings control panel, you can easily change the default settings of the program. Various advanced and common print settings as well as print engine selection are available here. You can set up page range, number of copies, page collation, and much more. This settings panel will let you set up specific configuration only once, with no need to specify these parameters in the command line using 2Printer Syntax each time.
Ways to Use 2Printer

Run a command from Command Prompt or PowerShell

Create a VB script or BAT file to run the conversion on schedule or event

Integrate 2Printer into your own code or existing software
What else you can do with 2Printer
Add QR codes before batch printing
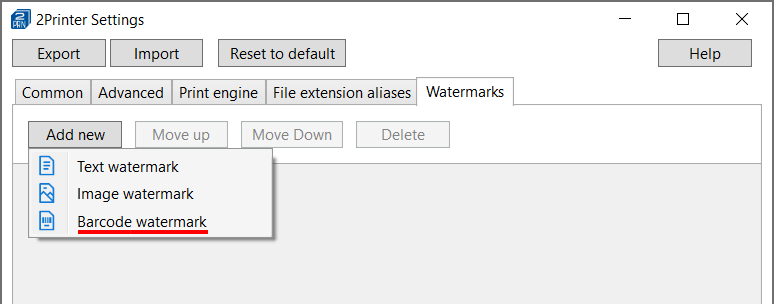
Do you need to add a QR code that leads to your company website or any other web address? No worries! With 2Printer, you can easily insert customizable QR codes and other types of barcodes onto document pages. There are various barcode types to choose from, such as Code 128, EAN, UPC, QR-CODE, and more. The barcode watermark feature is available through 2Printer Settings.
Print multipage documents in direct or reverse order
Change the pages' printing order to reverse if necessary. It can save you time and you won't need to have to manually re-sort the pages of a multipage document.

Disable printing blank pages
During the printing process, sometimes you may get a trailing blank page added to the document, which is not needed. But it is possible to skip them by default – use the Disable printing empty pages setting.

Avoid printing duplicate pages
With 2Printer, you can automatically disable printing the same document pages more than once, for example, if overlapping page ranges were specified. To use this feature, enable Skip repeated pages in the Advanced Settings.
Imagine you have documents with varying page counts – some with multiple pages, others with just one. If you set the page range to 1,last to print the first and last pages, you might unintentionally print single-page documents twice. This wastes paper, as these documents' first and last pages are the same. To prevent this, enable the Skip repeated pages option.

Delete empty subfolders if they are not needed
You can automatically delete empty subfolders that are no longer needed after the printed files are moved or deleted by a post-processing action.


Configure page layout: alignment and offset
You can position the prints in the center or left, right, upper or lower corner of a sheet or shift the pages' position vertically and horizontally by setting a specific value. You set up page alignment and offset (Horizontal/Vertical alignment, Horizontal/Vertical offset) in 2Printer Settings to make them default. Or, add parameters directly to the command: hot_align, ver_align, hor_offset, ver_offset.
Keep a log of files that were not processed
If some files did not print for some reason (unsupported file type, printing error, etc.), there's an ability to create a log file with their filenames and paths. Besides, you can change the location where 2Printer must keep all other log files.

Print password-protected files
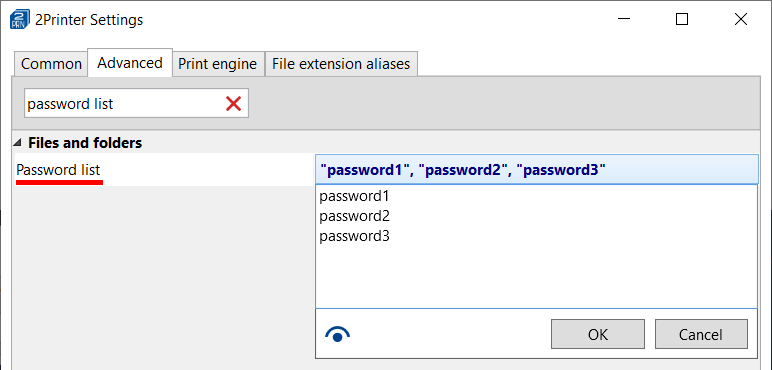
2Printer can batch print password-protected documents. If you have more than one file secured with passwords, you can specify multiple passwords, too. Add one or more passwords next to the Password list setting in 2Printer Settings to do this task.
Edit source files when they are being printed
You can open and edit the files that 2Printer is currently processing. Just enable Keep source files available for editing setting in 2Printer Settings. This way, you can work with your files while they're being printed and keep workflows uninterrupted.

Execute a script before printing a document
With runscript parameter, you can automate the execution of any script before printing each document. For example, you can automatically clear the printer memory buffer this way.

Change Color/Grayscale mode for different page ranges
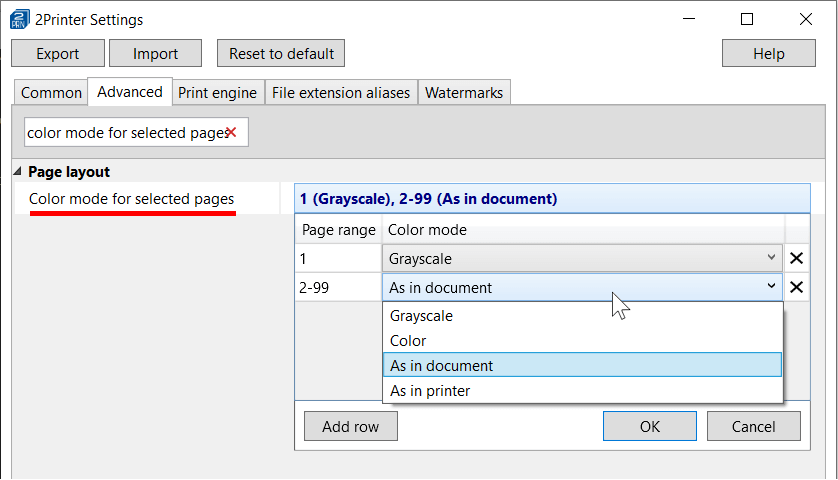
You can change the color mode for different page ranges or specific pages. For example, you can have the first page always printed in color and all other pages – in shades of gray.
Print attachment or service page in the same print job with the document
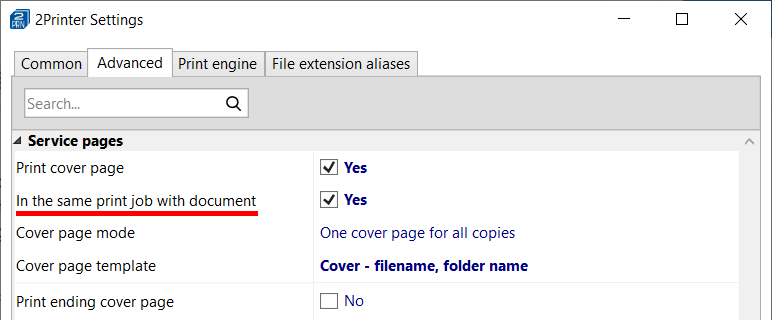
Printing a document and a cover page or document's attachment in the same print job ensures they will be printed one after another and will not get mixed. It can be handy, for example, if you want to staple them together after printing. To use any of these features, enable them in the Advanced Settings:
- Service pages → In the same print job with the document
- Attachments → In the same print job with the document
Types of printing available with 2Printer

Batch Printing
Printing multiple PDFs or other office documents can be a time-consuming process if you do it manually. With 2Printer, you can easily print all documents in a folder or multiple files listed in a text file. All you need is to define a printer and a source where your documents are located – a folder or a list with files' destination.

Scheduled Printing
If you need to print out reports or any other documents by 09:00 every Friday morning, you don't have to do it manually. Using 2Printer and Windows Task Scheduler, just set up scheduled printing of files and automatically schedule a print task to run at a specific date and time.

Silent Printing
Silent printing means printing automatically, either by bypassing the print dialog altogether or automated printing when the dialog appears. This is particularly useful, for example, if you print many labels for dispatch. 2Printer can print silently in the background without showing the print preferences dialogue boxes.

Virtual Printing
You can use 2Printer with a virtual printer to automate the conversion of documents to PDF or images such as JPEG, TIFF, and PNG. Instead of using your office or home printing device, try using a virtual printer such as Microsoft Print to PDF, Adobe PDF Printer, or Universal Document Converter.

Script-based Printing
Thanks to the command line interface, you can create your own script files to automate printing documents at a specific time or event. You can create simple batch files (BAT), Command Prompt (CMD), PowerShell (PS1), or Visual Basic scripts (VBS) and schedule their execution via the Task Scheduler.

Printing as a Service
You can run 2Printer from a Windows service. To set up printing as a service, it is possible, for example, to create a Windows Service in C# using Visual Studio. From such a service application, you can run 2Printer commands.
Looking for a specific feature?
Power users, developers, and system administrators, or just anyone familiar with Command Prompt (cmd.exe) can use 2Printer to fully automate printing of documents or images. Please check the Syntax and Settings pages to learn about all available parameters and settings in detail.
We continuously improve our command line utilities and other software products thanks to your feedback and suggestions. Please send us your feature requests, any thoughts, or ask questions via the support page.